How to Change Your Facebook Page Name

Sometimes, the first time isn’t the charm. Sometimes, you figure out a better name for your Facebook page a couple of weeks down the line. Don’t worry, you can change your Facebook page’s name at any time!
To get started, open the Facebook page in your favorite browser (at the time of writing, we weren’t able to access the option in the Facebook mobile app). We’ll be using the new Facebook interface to guide you through the process.
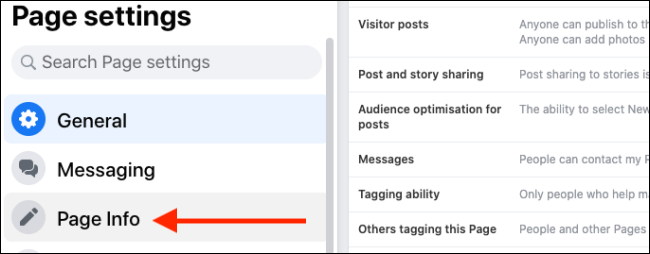
After opening the Facebook Page, click the “Page Settings” button in the bottom-left corner of the page.

Here, click the “Edit Page Info” button from the sidebar.
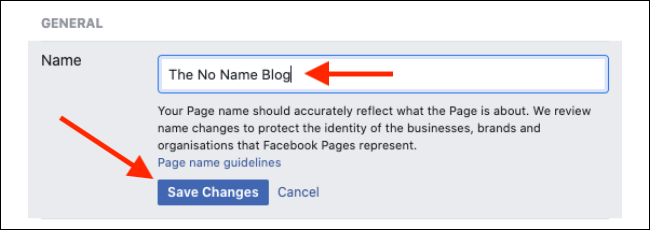
You’ll now spot the “Name” option in the General section. Here, select the text box, and replace the current name with the new Page name. Click the “Save Changes” button to save your new name.
Related: Best IPTV App For Android and Amazon Firestick Devices
You’ll be prompted to double-check and confirm your changes. When you’re ready to continue, click the “Request Change” button.
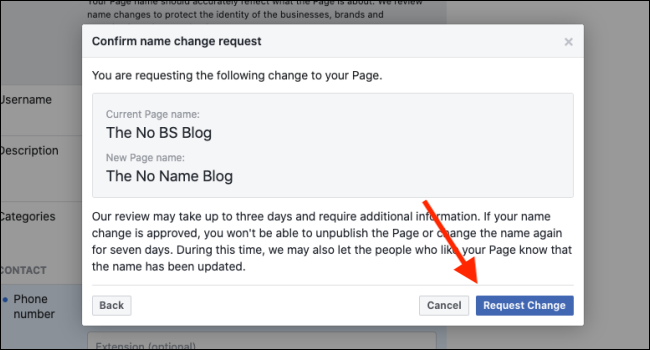
Facebook will now review your request. If the new name you chose passes Facebook’s page name guidelines, you’ll get a notification saying that the change has been approved.
If you don’t see the option to change the name, you might not have the power to make such changes in your Page role, or there might be limits on your Page itself.
Just upgraded to the new Facebook interface? Don’t forget to try the dark mode!


Leave a reply