How Difficult Is It to Replace an iPhone Battery?
With iPhone owners rushing to get their batteries replaced, wait lists at the Apple Genius Bar have been getting longer and longer. But if you don’t want to wait, you can actually replace the battery yourself.
RELATED: The Two Quickest Ways to Set an Alarm on iPhone or iPad
Long story short, Apple has admitted that your iPhone will actively slow itself down if it has an old, degraded battery. To get back that lost performance, though, users are recommended to replace the battery with a fresh, new one.
The only problem is that there’s a wait list at pretty much every Apple Store. You could try a local Authorized Service Provider, but there’s still a good chance you’ll be waitlisted there as well. And it might be a while until things settle down.
RELATED: How to Use Picture-in-Picture on iPhone
Some patient iPhone owners might be able wait it out, but if you want your battery replaced right now, your best option is to replace it yourself. It may seem like a daunting task, but it’s more doable than you think, and just as cheap. I personally decided to lose my iPhone-tinkering virginity and try it out on my wife’s iPhone 6. Here are my thoughts on the process.
The Parts and Tools Are Easy to Come By (and They’re Cheap)

Obviously, before you replace the battery in your iPhone, you’ll need the proper tools and a new replacement battery. Luckily, iFixit sells battery replacement kits for most iPhones, which include the new replacement battery along with all the tools you’ll need to get the job done.
The best part is that these kits aren’t that much more expensive than what Apple charges. The iPhone 6 kit costs around $37 once you factor in shipping charges, while Apple charges $30. Paying seven extra dollars isn’t too shabby in order to avoid a weeks-long wait.
Plus, iFixit also offers extremely thorough how-to guides on replacing the battery, all the way down to showing close-up photos of the process. So even if you’ve never done something like this before, these guides take you through the process step by step.
It’s Mostly Screws and Connectors
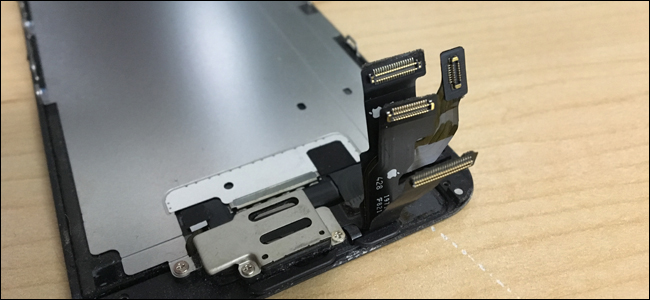
Don’t get me wrong: the circuitry and assembly inside an iPhone is no joke, and some repairs can be really difficult. But when it comes to replacing the battery, you’ll mostly be dealing with screws and connectors, with a little bit of adhesive. Nothing that you’ll be dealing with is soldered down or permanently connected to anything, so you can put the soldering iron and other heavy-duty tools back in the drawer.
RELATED: All the Ways Your Location Can Be Tracked on an iPhone
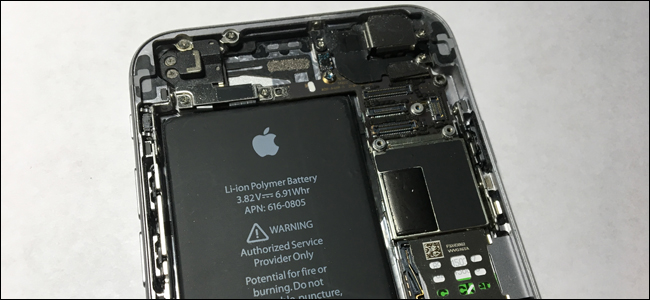
As for the adhesive, the battery is secured using 3M Command Strip-esque adhesive, which can cause headaches if they break as you’re removing them (more on that later). There is also some adhesive around the edge holding down the display assembly on newer iPhones, but a little applied heat to loosen it up makes the job a bit easier.
Other than that, you just have screws holding down the battery connector cover, as well as the display assembly cover. Once those things are removed, you simply pop off the connectors to the display assembly and the battery.
Some Steps Can Be Tricky

Screws and connectors are easy, but as I mentioned above, some steps (like the adhesive) can be a bit rocky.
First, if you have an iPhone 7 or newer, you’ll need to apply some heat around the edge of the phone to soften up the adhesive that glues the screen to the rest of the phone, but don’t worry—the iFixit guide shows you how to do this. As for the iPhone 6s, it has a small amount of adhesive around the edge, but not enough to require heat (although it wouldn’t hurt). The iPhone 6 and older don’t have any adhesive around the edge.
Starting with the iPhone 7, Apple began waterproofing its iPhones by upgrading the adhesive seal around the edge. Once you break that seal, you’ll still be able to reassemble the iPhone without a problem, but the seal around the edge will no longer be watertight. Thankfully, you can buy new adhesive from iFixit and replace the seal if you want to keep the waterproofing, but it’s not required by any means, and there’s no guarantee like you’d get from official Apple service.
As for the adhesive holding the battery down, there are tabs at the bottom that you slowly pull on to remove the adhesive strips, just like you would when removing a 3M Command Strip. The only problem is that they’re extremely thin and prone to breaking off, especially when they get snagged on a nearby piece of metal.

When that happens, you have to resort to heating up the back side of the device to soften up the adhesive and then slowly pry the battery off, making sure not to bend it too much—lithium-ion batteries are fairly dangerous, since they contain harmful chemicals and can possibly light on fire if punctured or damaged in any way.
Don’t let that scare you, though, as a little bending is fine and you can severely decrease any risks by completely discharging the battery before you bust open your iPhone. Just be sure to take your time and try not to go all Bruce Lee on the battery when trying to remove it.
Take Your Time, Do Your Research, and Just Follow Directions

Replacing the battery in your iPhone definitely isn’t easy, but it’s certainly doable. And it definitely doesn’t require a certified professional with years of experience.
As long as you take your time, do your research (like reading through the guides and watching the accompanied videos), and just follow directions, you can replace the battery in your iPhone without a problem. And of course, a little bit of determination goes a long way.
After you successfully do it once, it gets easier the next time. Soon you’ll be replacing all your friends’ and family’s iPhone batteries and may even become your town’s local hero.


Leave a reply